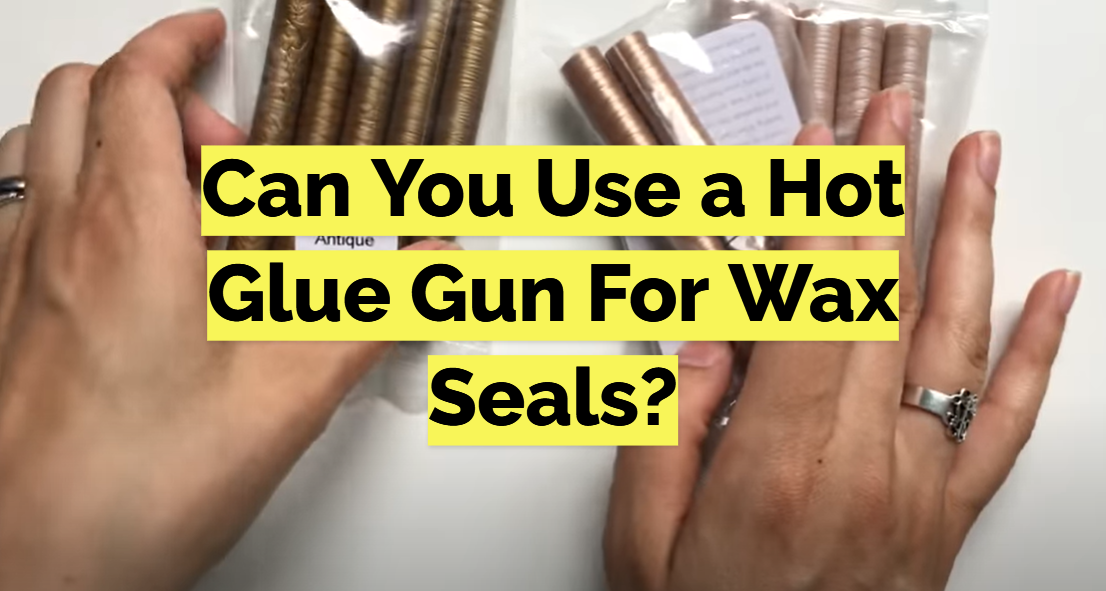
When it comes to sealing an envelope, there are a few different methods you can use. One popular option is wax seals. If you’re looking for a quick and easy way to create beautiful wax seals, a hot glue gun is the tool for you! In this comprehensive guide, we’ll tackle all of your concerns regarding wax seal hot glue guns. In addition to giving our honest opinion on various products, we’ll also show you how to get the most out of them. Let’s get started!
Table of Contents
Making Seals With A Glue Gun
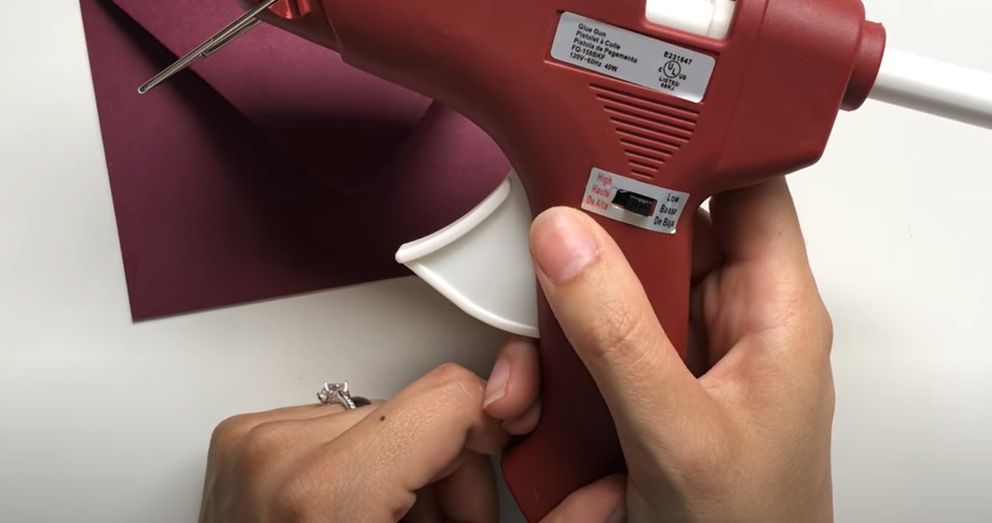
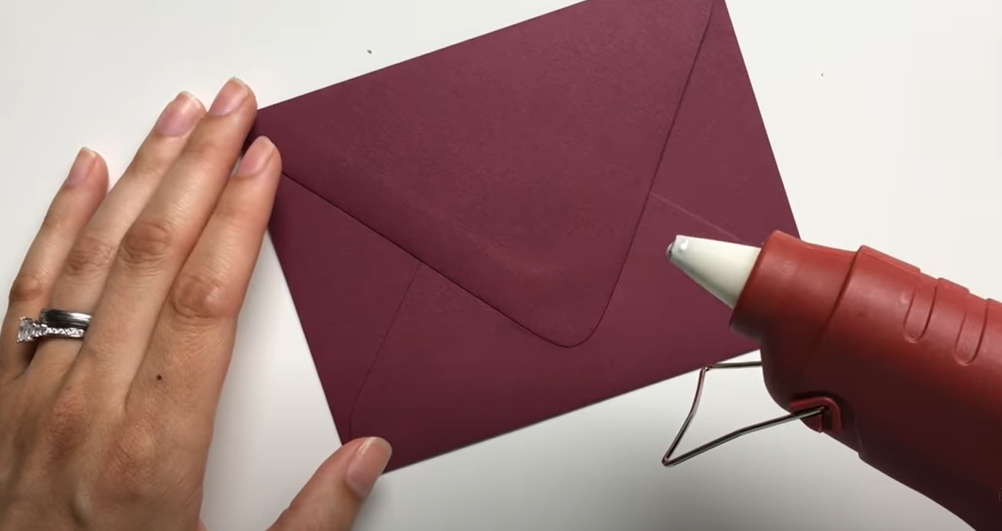
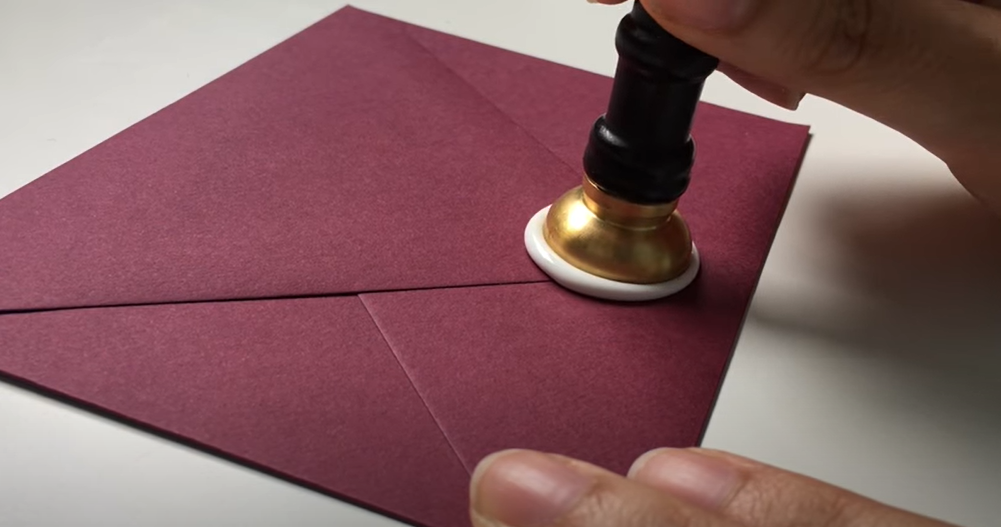
If you’re new to the world of wax seals, the process may seem a bit daunting. But don’t worry, it’s actually quite simple! All you need is a hot glue gun and some sealant wax. Once you have your supplies, follow these steps:
- Melt a small amount of wax in the glue gun by turning it on and letting it heat up for a few minutes.
- Apply the melted wax to your envelope in any design you like. Be sure to work quickly as the wax will harden fast.
- Press your seal into the melted wax and hold for a few seconds to allow it to adhere.
- Allow the wax to cool and harden completely before mailing your envelope.
A few practice runs and you’ll be an expert at making wax seals!
Pouring Glue From A Melting Spoon
The next step is to pour the melted glue from the spoon into the mold. Be very careful when doing this, as hot glue can cause serious burns. Pour slowly and carefully, filling the mold completely. Once the mold is full, allow it to cool for a few minutes before moving on to the next step.
Once the seal is firm, carefully pop it out of the mold and admire your handiwork! If everything went well, you should have a perfect wax seal that’s ready to use. If not, don’t worry – hot glue is very forgiving and easy to work with, so you can always try again.
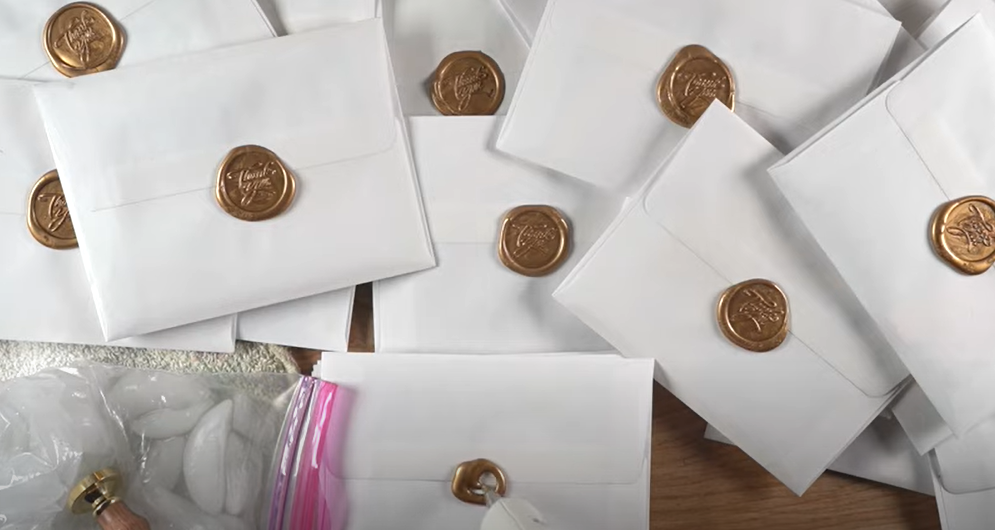
That concludes our overview of utilizing a hot glue gun for wax seals, which should help you get started. With a little practice, you’ll be able to create beautiful and unique seals for all your projects. So go ahead and give it a try – you might be surprised at how much fun it is!
Melting Glue Sticks Overheat
If you’re melting your wax sticks in a glue gun, make sure the wax isn’t excessively hot. If you leave it in too long, it will discolor and start to emit smoke. Instead, melt the wax slowly and steadily, being careful not to overdo it.
You can also use a double boiler to melt your wax sticks. This is a safer method, as it prevents the wax from overheating and smokes. Simply place your wax sticks in the top of a double boiler and heat them until they’re melted. Then, use a spoon or spatula to pour the melted wax onto your paper or envelope.
Another option is to use an electric candle warmer. These are specifically designed for melting wax, so they’re a great option if you’re looking for an easy and safe way to melt your wax sticks. Simply place your wax sticks on the warmer and let it do its job.
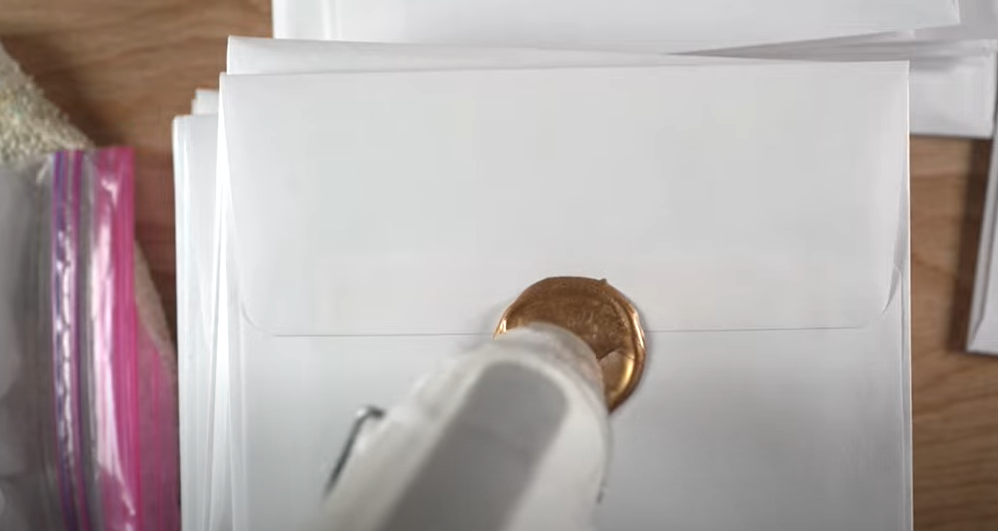
Once you’ve melted your wax, it’s time to start sealing! Dip your seal into the melted wax and then press it onto your paper or envelope. You can also use a stamp pad to apply the melted wax to your seal before pressing it onto the paper.
When it comes to melting wax sticks with a hot glue gun, there are a few things to bear in mind:
- Don’t overheat the wax, as this can cause it to discolor or smoke.
- Use a double boiler or electric candle warmer for a safer melting process.
- Be sure to seal your envelopes or letters quickly after applying the wax. If the wax cools and hardens before you’ve had a chance to seal it, simply reheat the wax and try again.
You’re now ready to apply a hot glue gun to your wax seals with these ideas in mind! Have fun and be creative with it – there’s no wrong way to use a hot glue gun for this purpose. Get creative with your ceiling designs, experiment with different colors of wax, and enjoy the process of creating beautiful, unique seals for all your correspondence.
Glue Guns And Wax Seals: Pros And Cons
If you’re wondering whether you should use a hot glue gun or wax seal to secure your envelopes, there are pros and cons to both methods. Wax seals have a more traditional look and feel, while hot glue guns are quicker and easier to use. Here’s a closer look at each option:
Hot glue guns are much easier to use than wax seals, and they’re perfect for securing envelopes in a hurry. The downside is that hot glue can be difficult to remove, and it doesn’t have the same classic look as wax seals.
FAQ
How do you glue wax seals?
If you’re looking to add a touch of class and elegance to your invitations or letters, using wax seals is a great way to do it. But what’s the best way to glue them down? In this comprehensive guide, we’ll answer that question and more, with product reviews, tips, and more.
Wax seals are traditionally made from a mixture of beeswax and resin, which is then molded into the desired shape. To attach them to your paper, you’ll need to use an adhesive. The most common type of adhesive used for wax seals is hot glue.
Hot glue guns are easy to use and give you a lot of control over how much adhesive you apply. They also set quickly, so you won’t have to wait long before you can move on to the next step in your project.
Begin by heating up the glue gun before using it to create wax seals. Then, apply a small amount of glue to the back of the seal. Be careful not to use too much, or the glue will seep through and ruin the look of your seal. Once you’ve applied the glue, press the seal onto your paper and hold it in place for a few seconds until the adhesive sets.
What can you use to stamp a wax seal?
The most important thing you need for a wax seal is the stamp. This can be anything that leaves an impression in the wax, as long as it’s not too big or too small for the size of your sealing wax. You can use a coin, a ring, or even a simple paperclip! If you want to get really creative, there are companies that will make custom stamps with your initials or any other design you choose.
Once you have your stamp, all you need is some sealing wax and a heat source. A lot of people use candles, but I find that using a hot glue gun is much easier and less messy. Don’t forget to use low-temperature glue sticks so you don’t get burned!
If you’ve never used a hot glue gun before, don’t worry – it’s really easy. Just plug it in and wait for the glue to melt, then apply it to your stamp. You can also hold the stamp directly over the glue gun, but be careful not to touch the hot metal tip!
Once you have a good amount of glue on your stamp, press it firmly into the wax. Hold it in place for a few seconds to ensure that the impression is secure, then slowly remove it. If everything went well, you should now have a perfect wax seal! You can use them to close envelopes, decorate invitations, or even make your own greeting cards. If you want to get really fancy, you can even try your hand at making your own sealing wax.
How do I make my own self adhesive wax seals?
If you’re interested in making your own self adhesive wax seals, there are a few things you’ll need to get started. First, you’ll need a hot glue gun and some sticks of glue. You’ll also need some sort of mold or stamp to create your design, as well as the wax itself. Finally, you’ll need something to attach your seal to – whether that’s an envelope or a piece of paper.
To get started, simply heat up your glue gun and apply a small amount of glue to your mold or stamp. Then, press it into the wax and hold for a few seconds to make sure the design is transferred. Once you’ve made your impression, carefully peel it away from the wax and voila! You’ve got your very own self adhesive wax seal.
A few key points to remember when using this method. First, be sure not to use too much glue, or you’ll end up with a messy seal. Second, be careful when peeling the mold or stamp away from the wax – if it’s not released easily, it’s likely that your design hasn’t transferred fully. Lastly, remember that self adhesive wax seals aren’t as strong as traditional melted wax seals, so don’t use them for anything that needs to withstand a lot of wear and tear.
Are wax seals allowed in the mail?
Yes! You can use wax seals on envelopes when sending mail through the United States Postal Service (USPS). Here are a few things worth considering. First, the USPS requires that you use a non-toxic sealant. Second, your envelope needs to be able to withstand the heat of the sealing process without melting or burning. Finally, make sure your wax seal is properly affixed to the envelope so it doesn’t come off in transit.
If you’re looking for a nontoxic option, we recommend using a hot glue gun with beeswax pellets. Beeswax is a natural product that is safe for both people and animals. Plus, it has a lower melting point than other types of wax, so it’s less likely to damage your envelope.
To use a hot glue gun for wax seals, simply place a small amount of beeswax pellets in the barrel of the gun. The envelope should be heated until the wax melts before applying it. You’ll need to work quickly because the wax will start to harden as soon as it cools. Once you’ve applied the wax, press your seal into it and hold for a few seconds to set.
How do you make a wax seal with hot glue?
Hot glue is a popular choice for making wax seals because it is easy to find and relatively inexpensive. You may utilize any sort of hot glue, although low-temperature hot glue guns are the finest choice since they will not damage the wax.
To make a wax seal with hot glue, start by heating up your glue gun and then applying a small amount of glue to your stamp. Next, press the stamp into the melted wax and hold it there for a few seconds to allow the wax to cool and harden. Remove your stamp from the glue after the wax has hardened and you may see your lovely new wax seal!
If you want to add some extra flair to your seals, try using colored hot glue or adding glitter to the melted wax before stamping it. You may also try out various stamps and sealing waxes to make your own designs. Have fun and get creative with whatever you do!
Can I use crayons for wax seals?
Yes, you can use crayons for wax seals! Crayons are a great option if you want to create colorful or multi-colored wax seals. To use crayons, simply melt them in a double boiler or in the microwave and then dip your stamp into the melted wax. You can also add some glitter or other embellishments to the melted wax before stamping it. Once the wax has hardened, you can remove your stamp from the crayon to reveal your beautiful new wax seal!
If you want to experiment with different colors and designs, try using different colors of crayons or mixing them together to create new shades. You can also try using different stamps and sealing waxes to create unique designs. Whatever you do, have fun and get creative!
How do you make a wax seal without a stamp?
There are a few ways that you can make a wax seal without using a stamp. One way is to use a hot glue gun. You can create your own design on the glue gun and then use it to create your wax seal. Another way is to use a stencil. You can find stencils online or in craft stores. Use the stencil to trace your design onto the wax and then cut it out with a sharp knife.
Another option is to freehand your design onto the wax. This will require some practice but it is possible to do. If you make a mistake, you can always melt the wax and start again. Once you have your design, place your wick into the center of the wax and light it. Hold the wax over the paper and watch as your design is transferred onto the paper. Allow the wax to cool and then enjoy your new wax seal!
Can I use a rubber stamp for a wax seal?
Yes, you can use a rubber stamp for a wax seal. The main difference between using a rubber stamp and using a hot glue gun is that with a rubber stamp, you need to be very careful not to over-stamp the wax and create an impression that is too deep. With a hot glue gun, you can simply hold the tip of the glue gun close to the surface of the wax and carefully apply pressure until the desired amount of wax is dispensed.
Another advantage of using a hot glue gun is that you can easily control the width of the bead of wax by moving the tip of the glue gun closer or further away from the surface of the wax. This allows you to create very precise designs with your wax seals.
How do you make a wax seal with hot glue and crayon?
Step One: Plug in your glue gun and allow it to heat up. While it’s heating up, find your seal and place the scrap paper over top. This will protect your work surface from any glue that might accidentally drip off the gun.
Step Two: Once the glue gun is heated, hold it about an inch above the paper and wax crayon. Move it back and forth until the wax melts and starts to drip onto the paper below.
Step Three: Quickly place your seal over the pool of wax before it cools and hardens. Hold it in place for a few seconds to make sure it’s securely affixed, then carefully peel it off the paper.
Is there a difference between sealing wax and candle wax?
The answer to this question is both yes and no. While there are some similarities between the two types of wax, sealing wax is specifically designed to create a seal on an envelope or other document. Candle wax, on the other hand, is meant to be burned in order to produce light and heat. Sealing wax is usually harder than candle wax, and it has a higher melting point so that it can withstand the heat of a glue gun without losing its shape.
Useful Video: How To Use Wax Seals – Wax Seal Tutorial Using A Glue Gun
Conclusion
Overall, we think hot glue guns are a great way to make professional-looking wax seals. They’re easy to use, relatively inexpensive, and give you a lot of control over the final product. If you’re looking for a quick and easy way to add a touch of class to your invitations or letters, we recommend giving hot glue sealing a try! If you have any questions about using hot glue guns for wax seals, feel free to ask. We would love to hear from you in the comments below! Don’t forget to take a look at our other informative guide on wax seal stamping! Happy sealing!
References:
- https://stamptitude.com/blogs/news/the-glue-gun-method-for-wax-sealing
- https://www.wikihow.com/Make-%22Wax%22-Seals-Made-of-Hot-Glue
- https://www.thepaperbox.co.uk/blog/how-to-use-sealing-wax-sticks-with-a-glue-gun-or-spoon/
- https://sandyallnock.com/glue-guns-and-wax-seals-pros-and-cons/